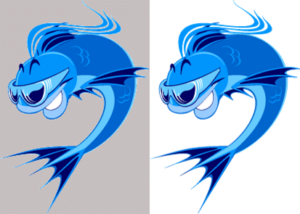
![]() Want to edit an image so that you can make the same as a transparent one? Then we will guide you in doing so. Basically making an image transparent helps in embedding the same on any of the image or can be added as a background image of your website page. A background image which is in GIF format can be made transparent which can then be added wherever you want.
Want to edit an image so that you can make the same as a transparent one? Then we will guide you in doing so. Basically making an image transparent helps in embedding the same on any of the image or can be added as a background image of your website page. A background image which is in GIF format can be made transparent which can then be added wherever you want.
Be it a multicolored image or a colored background with variable colour schemes, you can make an image look with an transparent background as this will look better than having an image with an ugly looking square background. So, let’s proceed and see how we can make the background of an image into transparent.
Parameters for Choosing an Image for making its background transparent:
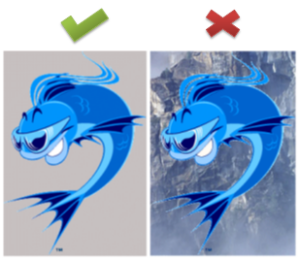
- First and foremost choose an image which has a background which is either linear or a plain background colour as then only you can make the background part as the transparent one.
- As shown above, you will have to make sure that colour is not spilled all across as in the case of right side image above, as this makes the software tool difficult in deciding what is the main image and what’s the background, due to which background can’t be made transparent accurately. Also, most importantly make sure the background color does not appear in the image itself. When you make the background of the image transparent, every part of the image with that same background color will be made transparent.
How to do it
- For making an image’s background as transparent you will need to download a software tool which is called as the Paint Shop Pro. This software can be downloaded easily from any of the software provider websites. Though this software is not free software, but a trial version of 30 days is provided after the download. If you like this software and want to continue using the same then you need to shell out 99$ to use it the way you want. Please note that this only makes the background images as transparent if the image is in GIF format. After downloading and installing the software, you need to go to File, and then you need to click on Open and choose the image from the path where you have stored the image.
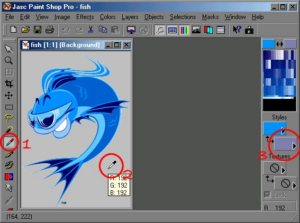
- Now, just click on the Doppler Icon
 and need to position your mouse over the background area of your image, and then just right click (don’t left click) on it.
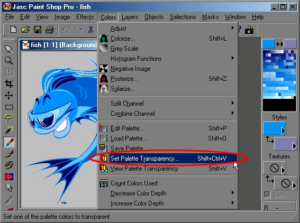
- Now, when you see the background colour appear in the background color palette as shown below, then you need to click on the colors tab and then go down to Set Palette Transparency as per your choice. Choose maximum for 100% background transparency.
- Now, after setting the pallete transparency as shown above you can see that image has more than 256 colors, now a message will come up asking you to reduce the image to a single, palleted, background color, here you just have to click on YES as seen in the above figure. Now, after this you need to then Decrease color depth window which will come up, just click OK on that.
- Note that if your image is already under 256 colors, you will not get these 2 messages as shown below,
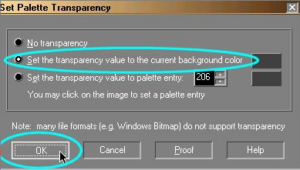
- Next up, you will need to click on yes if you see the above message. Now, after clicking on Yes, you will see a dialog box wherein you need to clock on the depth of the colour as shown below. You just need to click on the Set the transparency value to the current background color option, and then click OK as shown below:
Now, that’s it after selecting the option as mentioned above, you will find that the background has been successfully made transparent and then you can save the same and can upload on your web page. Basically, here the background doesn’t appear to be changed but seems transparent on the web page.

